Photo Lookup Guide: Verify Images Step by Step
Master photo lookup with this practical guide. Learn reverse image search, EXIF checks, AI detection, and how to verify people safely online.
You're probably here because a photo is bothering you.
Maybe it's a dating profile picture that looks too polished. Maybe someone reused one of your images without credit. Maybe you found a dramatic image in a post and want to know whether it's old, reposted, cropped, or synthetic. That's where photo lookup helps.
I run photo lookups every week, and the biggest mistake people make is expecting one tool to hand them the truth. It won't. A solid photo lookup is a verification workflow. You stack signals, compare them, and stop once you've answered the safety question or authenticity question that matters.
Photo lookup has been mainstream for a long time. Google Images launched in July 2001, and Google's own history notes that it marked the shift from text-only search toward visual search, later adding Search by Image so the image itself could become the query (Google Images anniversary history). That shift matters because visual verification is now normal, not niche.
What a Photo Lookup Can Actually Reveal
A photo lookup can reveal a lot. It can also tempt you into conclusions the evidence doesn't support.
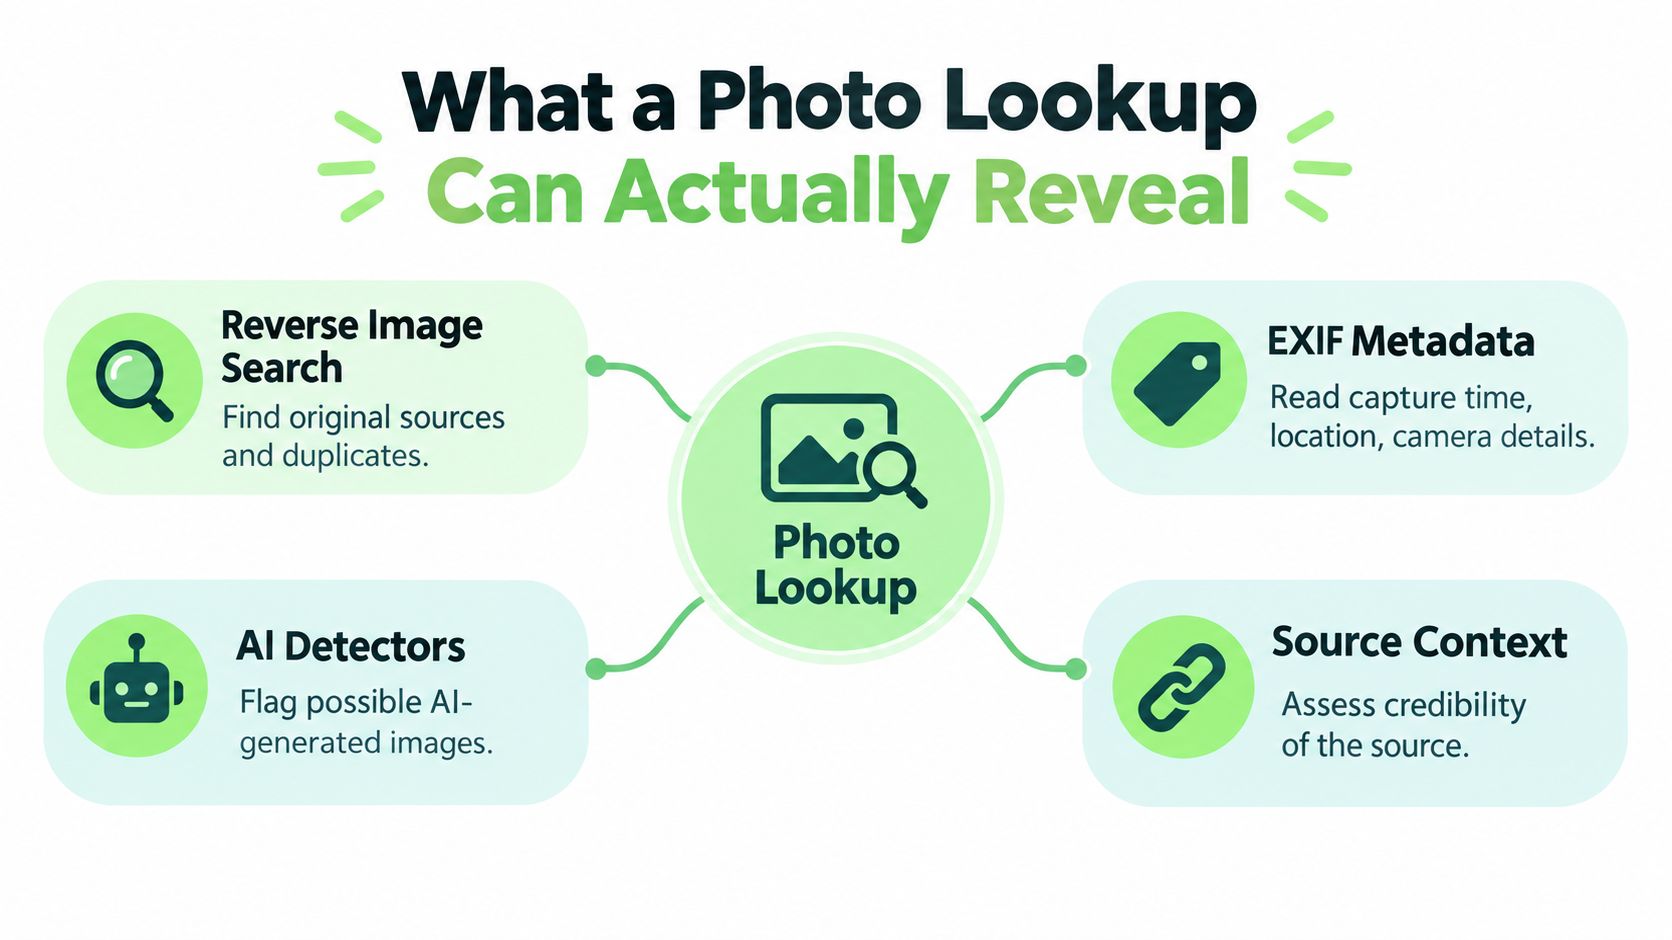
The useful mindset is simple. Treat every result as evidence of appearance, context, or inconsistency, not instant proof of identity. Reverse image search, metadata, AI detectors, and source checks each answer different questions.
What it can reveal
A reverse-image or photo lookup can show where the exact file or visually similar copies appear online. That's useful for checking whether a photo showed up earlier on another site, whether it was reposted across multiple domains, and whether the current use looks original or recycled. A practical verification method is to search the full image, then cropped versions, then log the earliest indexed appearance and the context around it (professional response guide on reused photos).
Metadata can add another layer. EXIF data can sometimes expose the camera model, timestamp, GPS coordinates, and other capture details, but that evidence is reliable only on the original file because many social and messaging platforms strip metadata during upload or re-sharing (OSINT guide on reverse image search and EXIF).
What it cannot prove
A match does not prove who is in the photo. It does not prove when the photo was taken. It does not prove that the account using the image belongs to the person shown.
Practical rule: A found match proves reuse or earlier publication. It does not prove identity.
AI detectors belong in the same caution bucket. They can flag patterns that look synthetic, edited, or inconsistent. They cannot tell you authorship with certainty, and they shouldn't be the only basis for accusing someone of faking an image.
The right mental model
Use layers, not shortcuts.
- Reverse search tells you where else the image appears.
- Metadata may tell you how the original file was captured or edited.
- AI detection may flag synthetic or altered characteristics.
- Source context tells you whether the surrounding page is credible, misleading, satirical, or stolen.
When those signals line up, confidence goes up. When they conflict, slow down. That's the whole game in photo lookup.
Running a Reverse Image Search Across Engines
No single engine is enough. If you only run one lookup, you're leaving evidence on the table.
The modern scale is huge. TinEye says it searches over 84.9 billion images, and another published estimate put Google Image Search at about 136 billion indexed images in 2023. The broader image environment is even bigger, with one photography statistics source estimating 1.94 trillion photos taken worldwide in 2024, up from 1.81 trillion in 2023 and 1.71 trillion in 2022 (TinEye reverse image search). That's why photo lookup works best as a multi-engine process. No single index sees everything.
Reverse Image Search Engines Compared
| Engine | Best For | Limitation |
|---|---|---|
| Google Lens | General fact-checking, web page discovery, products, text inside images | Can favor visually similar results over origin tracing |
| TinEye | Exact-match tracking, older appearances, modified copies, mirrored or color-shifted variants | Less useful for broad contextual discovery |
| Yandex | Faces as the main subject, broader visibility on some non-Western pages | Interface and result context can be uneven |
| Bing Visual Search | Extra pass for pages other engines missed | Usually not my first tool for provenance |
How I'd run the search
Start with the original file, not a screenshot if you can avoid it. Screenshots add interface chrome, crop edges, and often lower quality. If all you have is a screenshot, make a second version cropped tightly to the actual photo.
Then do this:
- Run Google Lens first. It's the best starting point for general context, especially when the image includes objects, products, landmarks, or text.
- Run TinEye next. Sort by oldest first and check whether the same image appeared years earlier on another site.
- Use Yandex if the face is central. It often surfaces facially similar or reused profile images that other engines miss.
- Finish with Bing Visual Search. It sometimes catches pages Google didn't surface.
If you want a broader starter walkthrough, Humantext also has a practical guide to free reverse image search options.
Small search changes that matter
Crop aggressively. For a person, search one version with the full frame and another cropped tightly to the face. For a product listing, crop out the background and run the product alone. For memes or viral screenshots, remove borders and captions if they weren't part of the original image.
A black-box test on 24 images found Google returned the correct image 65% of the time, compared with 55% for Bing and 50% for Yandex, with Google performing best across uncluttered, cluttered, and facial images (reverse image engine comparison study). That's useful, but don't overread it. Composition changes everything.
Search engines return context, not certainty. Your job is to inspect dates, pages, and reuse patterns, not just celebrate the first match.
Reading EXIF and Other Metadata Without Overreach
Metadata is valuable when you have the original file. It's weak when you're looking at something pulled from a social feed, messaging app, or marketplace screenshot.
That's the first rule. Don't accuse a photo of being fake just because the metadata is empty. Many platforms remove it automatically during upload or re-sharing.
The fields that actually matter
When I inspect a file, I care about a short list:
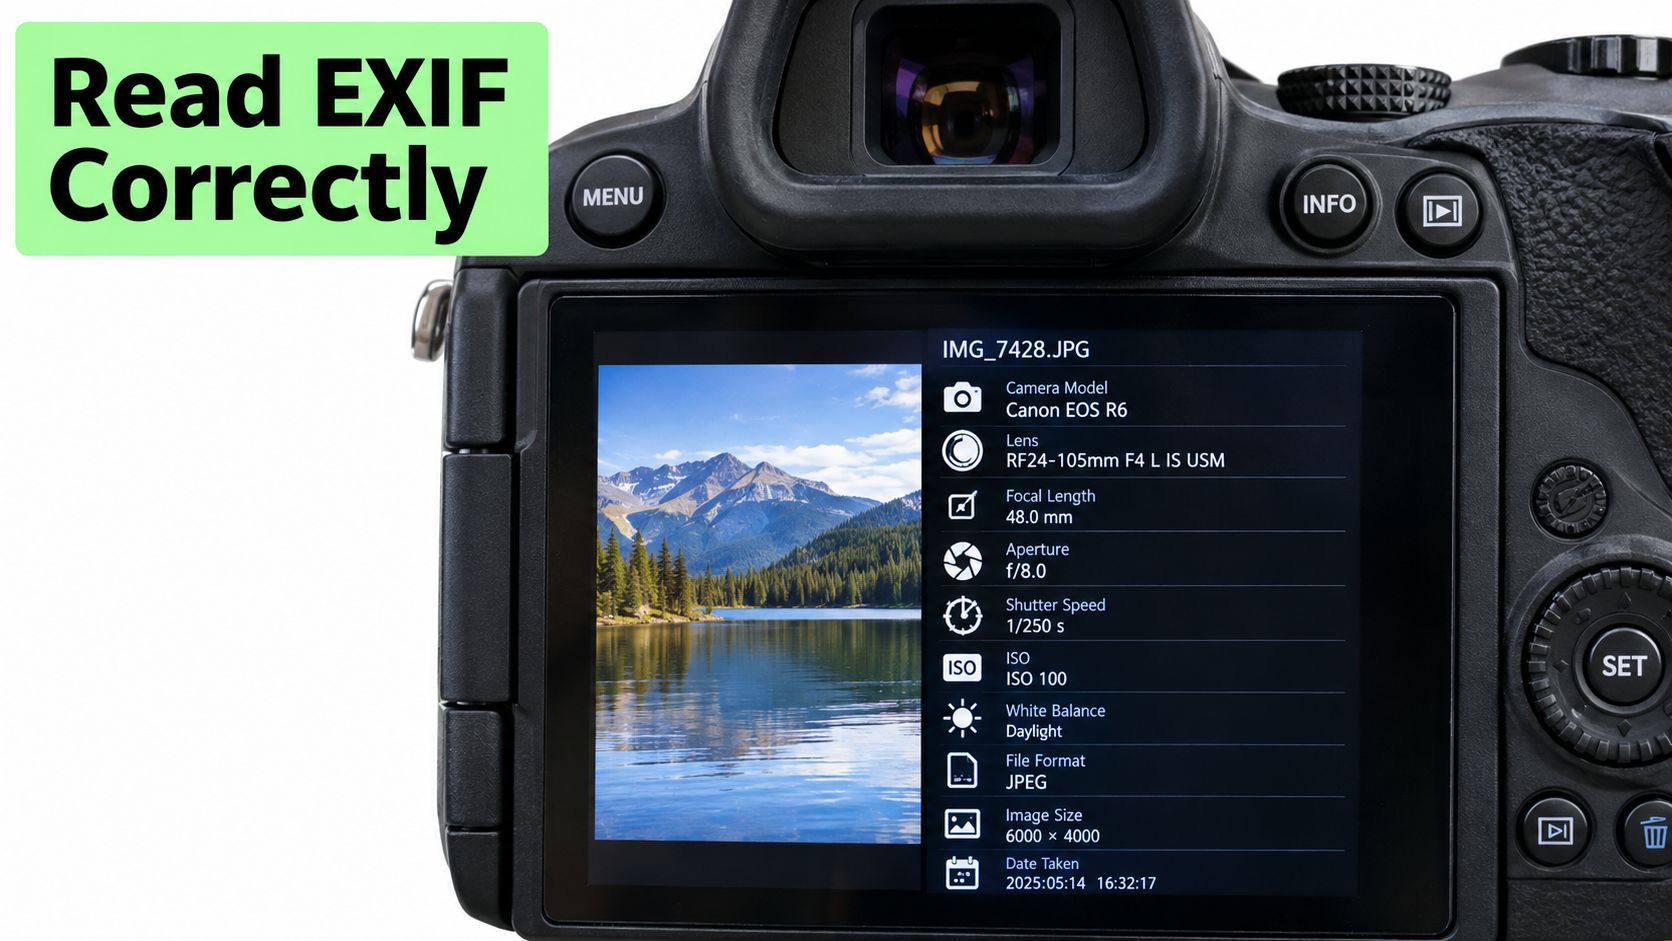
- DateTimeOriginal tells you when the camera says the image was captured.
- GPSLatitude and GPSLongitude may show where it was taken.
- Make and Model tell you what device captured it.
- Software can show whether editing software touched the image.
- Warnings from ExifTool can surface structural oddities worth closer review.
You can check this with ExifTool, ExifToolGUI, or browser-based viewers such as exifdata.com. Keep your expectations realistic. Metadata supports a claim. It rarely settles one by itself.
Here's what a metadata view typically looks like.
EXIF, IPTC, and XMP are not the same
People lump all metadata together, and that creates bad conclusions.
- EXIF is mostly camera and capture data.
- IPTC often carries editorial fields like captions and credits.
- XMP often tracks software-side information and edit history.
A platform may strip EXIF but leave behind other traces in IPTC or XMP after a save or export. That's why a shallow metadata check isn't enough.
How to read metadata without making a mess
Use consistency checks.
If the capture time fits the claimed timeline, the camera model is plausible, and the software field doesn't contradict the story, authenticity gets stronger. If the GPS says one place, the account claims another, and the timestamps look impossible, that's a red flag.
Missing EXIF is normal. Contradictory metadata is what deserves attention.
Also, don't trust GPS or timestamps from social images at face value. Phones can have the wrong clock. Location settings can be disabled, stale, or altered before the shot. Metadata is one signal. Useful, not holy.
Using AI Image Detection as a Quality Check
AI image detectors are useful when you treat them like a quality check, not a lie detector.
That framing matters. A detector can flag patterns associated with synthetic media, heavy editing, or recompression artifacts. It cannot tell you, by itself, who made the image, who posted it first, or whether a real event happened.
AI Image Detectors at a Glance
| Detector | Output Type | Best Use Case | Known Limitation |
|---|---|---|---|
| Humantext.pro | AI probability score for image verification | Quick media authenticity check as part of a broader workflow | Score should be cross-checked against source context and reverse search |
| Hive | Classifier-style authenticity signal | Fast screening of suspicious images at scale | Compression and cropping can affect output |
| Sensity | Synthetic media detection signals | Investigating manipulated or suspicious visual content | Similarity or artifact flags are not provenance proof |
What detectors are actually looking for
Different tools inspect different signals. In practice, I watch for four categories:
- Face artifacts: teeth patterns, skin texture, earrings, fingers, and glasses often break first.
- Lighting conflicts: shadows go one way, highlights go another, reflections don't agree.
- Frequency anomalies: smooth areas like skies, cheeks, and walls can carry unnatural patterns after generation or editing.
- Text failures: signage, labels, and printed words often warp or drift.
Those are red flags, not verdicts.
The workflow that keeps you honest
Upload the candidate image to one detector. Record the result. Then make a few neutral variants of the same image, such as a crop, a recompressed save, or a rotation, and test again. You'll quickly see how fragile these signals can be.
That's why I don't act on weak or unstable detector output. The smarter move is to pair the result with source tracing. If you're comparing tools, Humantext has a separate breakdown of AI photo detector workflows.
Recent coverage on reverse image search warns that cropped, color-shifted, and AI-generated images have widened the gap between what users expect and what tools can confirm, especially because visually similar results are not the same as original-source matches (analysis of modern reverse image search reliability).
What should make you suspicious
Hard red flags include repeated-looking teeth across different faces, melted jewelry on hands, warped text, impossible reflections, or detail collapse in ears and fingers. Soft signals are weaker. A face can look “too clean” and still be real. A heavily compressed image can look fake when it's just badly saved.
If a detector says “possible AI” and your reverse search finds an earlier post from a real photographer with consistent context, I trust the chain of source evidence more than the detector score. That's the right order of operations.
Two Real-World Verification Scenarios
Don't need a theory lesson. You need a workflow you can use tonight.
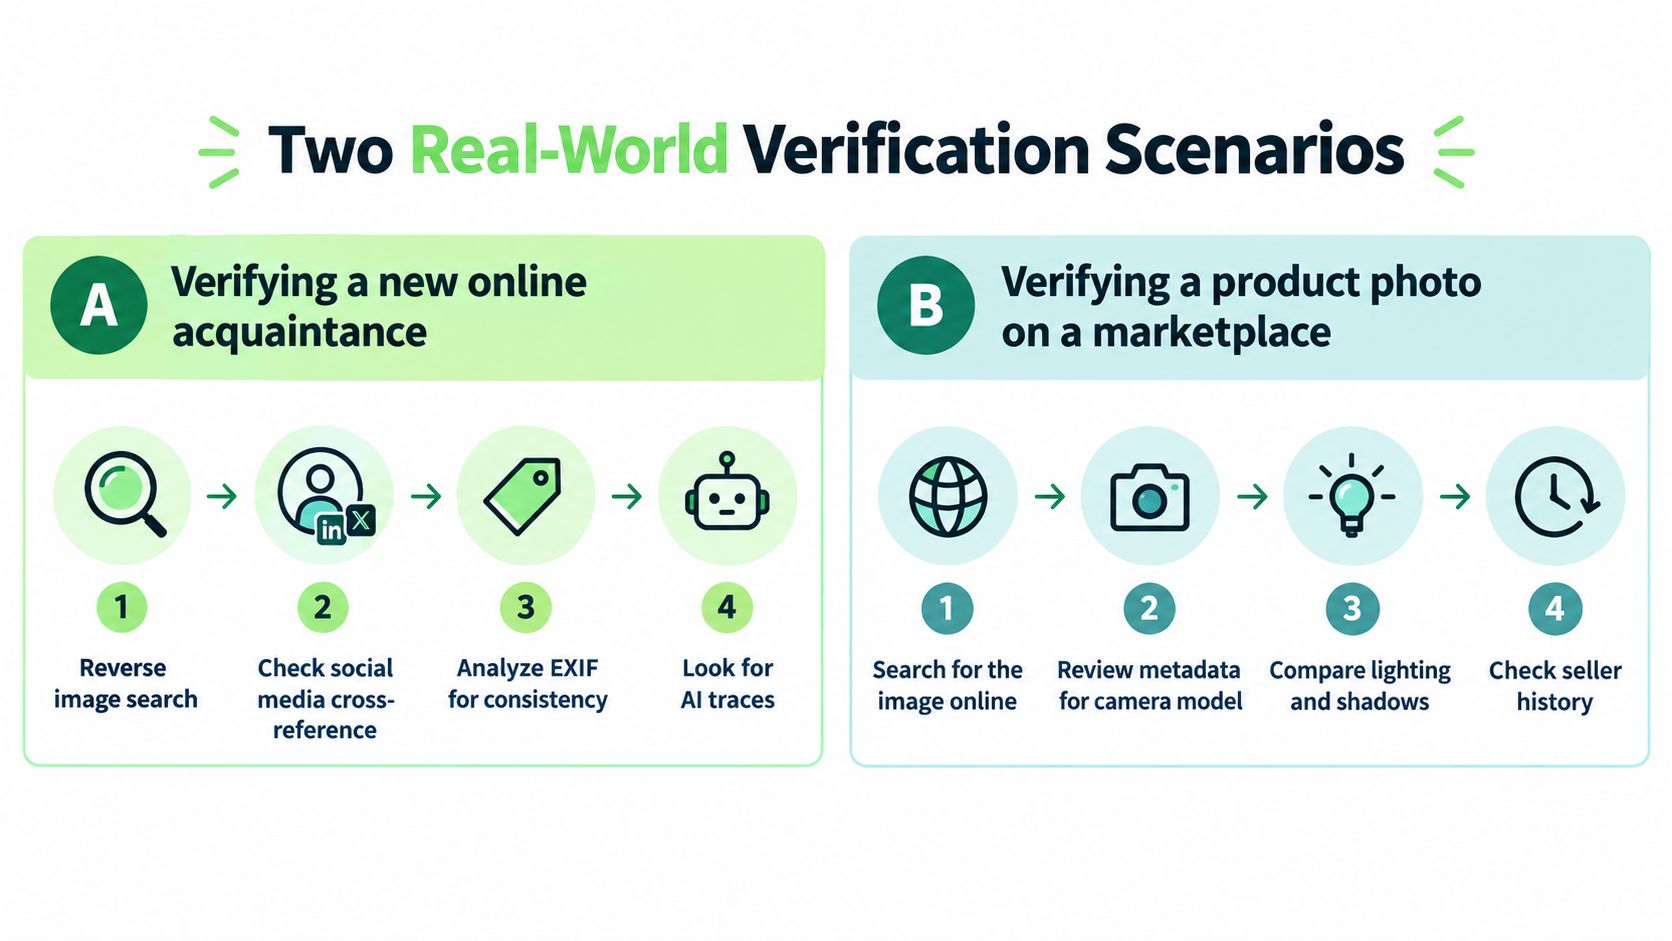
These are the two photo lookup situations I see most often: verifying someone you met online, and tracking reuse of your own photos.
Verifying someone you met online
Start with the profile image. Run it through Google Lens and TinEye. You're looking for earlier uses, stock-photo appearances, reposts on different names, or the same face attached to multiple bios.
This isn't paranoia. Photo lookup is widely recommended as a first-step safety check in catfishing and romance-scam screening, followed by a live video call or official verification before sharing money or private information (catfishing red flags and reverse image checks).
My order is simple:
- Search the full profile image first. If it appears on a modeling site, old blog, or another dating profile under a different name, stop trusting the profile.
- Run a tighter face crop next. This can expose alternate uses of the same portrait.
- Inspect the file if they sent you the original. Compare any capture details against their story.
- Use an AI detector as a check, not a verdict. If it looks synthetic, ask for a live video call.
If the person refuses basic verification but pushes emotional urgency, money requests, or off-platform contact, the lookup already did its job. You don't need courtroom proof to walk away safely.
If your safety question is answered, stop digging. You're not building a dossier. You're reducing risk.
Finding your own photos reused without permission
The workflow changes when the photo is yours.
Start with TinEye to map copies and sort by oldest or best match. Then use Google Lens to see how those copies are being contextualized. Are they reposted by aggregators, fake profiles, scraped blogs, or marketplaces?
You'll often find that stolen copies no longer carry the original metadata. That doesn't matter if you still have your local original with intact capture details and publication history. Build an evidence packet:
- Save screenshots of every matching page
- Log the page URL and visible date
- Keep your original file and creation record
- Note whether the image was cropped, mirrored, or edited
- Record any false attribution or impersonation
That gives you something usable for platform reporting, a takedown request, or a direct rights complaint. Don't overcomplicate it. You're documenting reuse and context, not proving motives.
Privacy, Consent, and Legal Limits
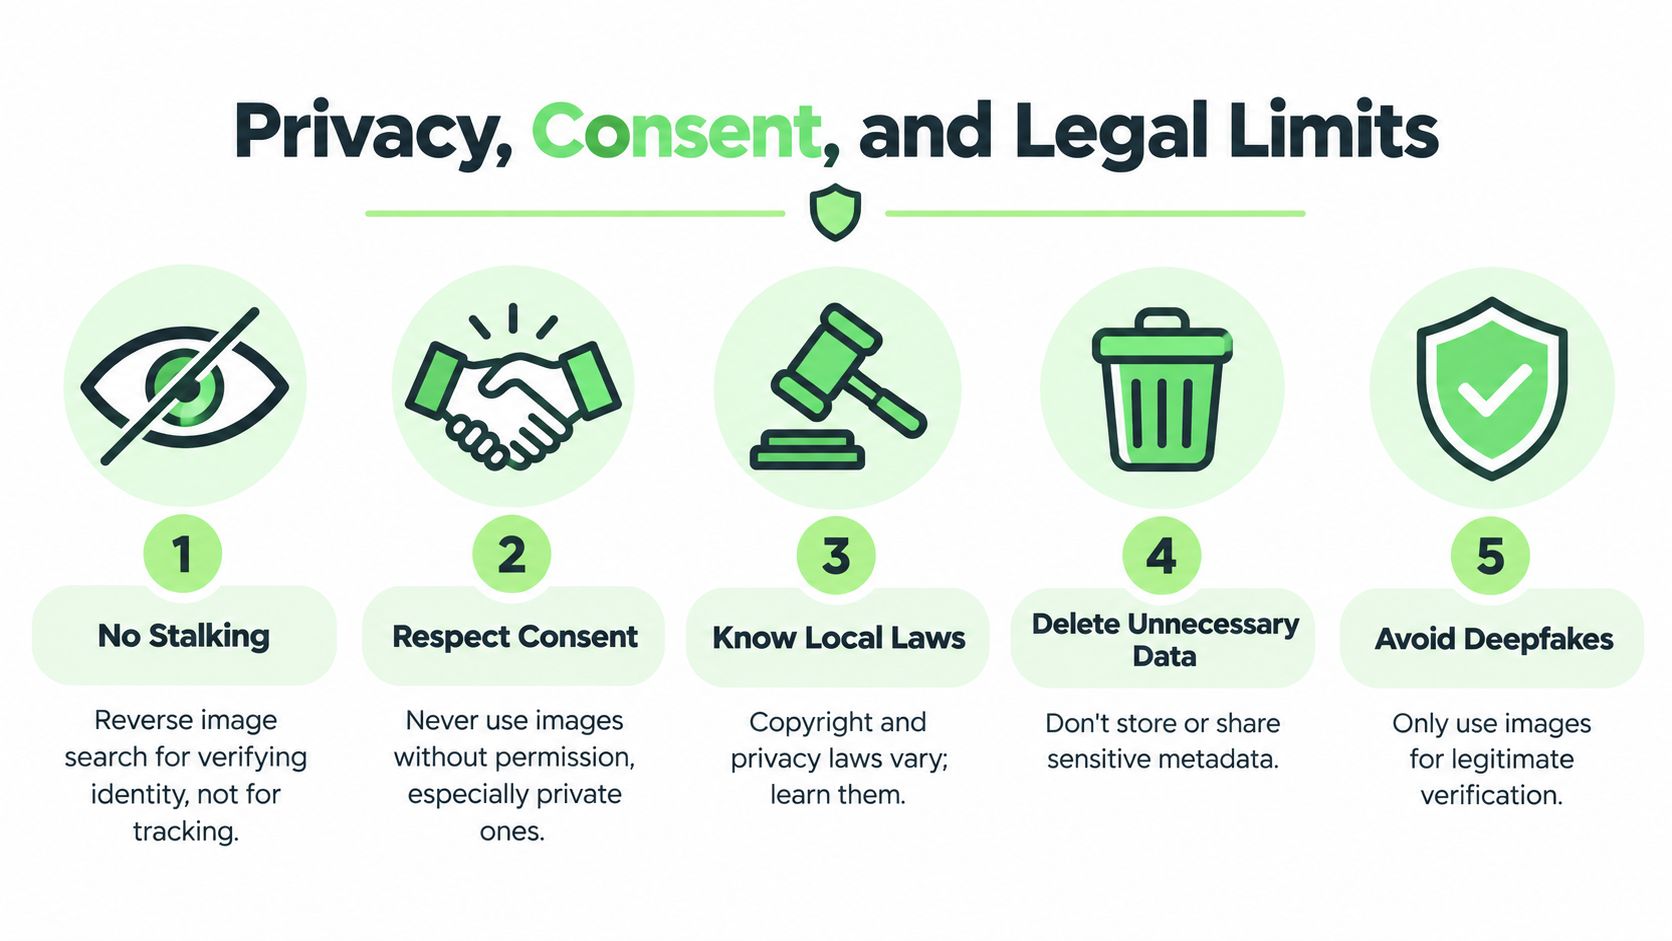
Photo lookup is useful. It also crosses a line fast when people use it to monitor, expose, or identify strangers who never agreed to that scrutiny.
Use it for fraud prevention, authenticity checks, and protecting your own likeness. Don't use it to stalk an ex, map a neighbor's movements, or identify random people from a street photo. Public visibility doesn't equal unlimited permission.
The line you should not cross
Independent ethics coverage warns that image search engines may index public images without consent and that face-search can normalize mass identification, especially when minors or vulnerable people are involved (ethical concerns of image search). That's why I treat person-focused photo lookup as a narrow safety tool, not a curiosity tool.
Some jurisdictions also restrict facial recognition or biometric face-search use. One 2026 policy summary says only two U.S. states had binding statewide K-12-specific face-recognition restrictions, while broader reviews reported 13 states and 23 local jurisdictions with facial-recognition laws, which shows how much legal limits vary by place (K-12 compliance and facial-recognition policy summary).
Practical consent rules
If you're uploading a photo to any verification service, read its retention and handling terms first. That matters even when the image is your own. If you want an example of what to inspect, review how a service explains collection and handling in its view privacy policy.
For a broader compliance angle, this summary on data privacy compliance for AI tools is worth reading before you build photo verification into a school, publishing, or marketplace workflow.
My non-negotiable rules
- Don't use photo lookup to stalk: Safety checks are legitimate. Surveillance is not.
- Don't publish findings to shame or coerce: Verification is for decision-making, not intimidation.
- Don't share geotags or home-address clues: If metadata exposes a private location, keep it private.
- Don't treat a face match as identity proof: Similarity is only a lead.
- Stop once the risk question is answered: More searching isn't automatically better.
That last point matters most. The goal is to decide safely, not to know everything.
Quick Reference and Final Verification Mindset
A good photo lookup routine is repeatable.
You don't need ten tools. You need a disciplined order and the restraint to avoid overclaiming. Reverse search tells you where an image appears. Metadata may support a timeline. AI detection can flag synthetic patterns. Source review tells you whether the surrounding context deserves trust.
Five actions worth repeating
- Run at least two reverse image engines. One search result set is never enough.
- Inspect metadata before assuming tampering. Empty fields are common after uploads.
- Check suspicious images with an AI detector. Treat the result as a signal, not a verdict.
- Cross-reference dates and source context. Earlier appearance matters more than visual similarity alone.
- Document what you found. Save screenshots, links, and notes for your own records.
A domain-specific study of Google reverse image search across 25 fresh image queries in categories including Fashion, Computer, Home, Sports, and Toys found that average precision ranged from 41.60% to 71%, while average normalized recall ranged from 47.21% to 71.31% depending on category and cut-off depth (study on precision and recall in Google reverse image search). That's a blunt reminder that retrieval quality varies, and users often need to inspect many results.
Trust should be built in layers. Single-tool conclusions are fragile. The point of photo lookup isn't certainty. It's reducing uncertainty enough to act safely, protect your work, and avoid getting fooled by context-free images.
If you want a fast way to start that process, Humantext.pro offers reverse image search and media verification tools that fit this exact workflow. You can use them to check where a photo appears online, review suspicious images as part of a quality-check routine, and repeat the same verification loop the next time a photo doesn't add up. Visit Humantext.pro.
Prêt à transformer votre contenu généré par l'IA en une écriture naturelle et humaine ? Humantext.pro affine instantanément votre texte, garantissant une lecture naturelle et authentique. Essayez notre humaniseur d'IA gratuit aujourd'hui →
Articles Connexes
10 Reverse Image Search Free Tools for Verification
Compare 10 reverse image search free tools and methods for desktop and mobile, with practical steps, privacy guidance, and safer verification use cases.

How to Write Descriptively with Vivid Sensory Detail
Learn how to write descriptively with sensory detail, strong verbs and vivid examples. Practical techniques, rewrites and prompts to make your writing shine.
What Is AI Law and How It Shapes Content in 2026
What is AI law? Learn EU AI Act, US rules, liability and IP risks, plus practical steps for creators to stay compliant in 2026.

